Provision PostgreSQL database
Create a database of your choice and configure it. To start provisioning your first PostgreSQL database Service, follow the steps.
-
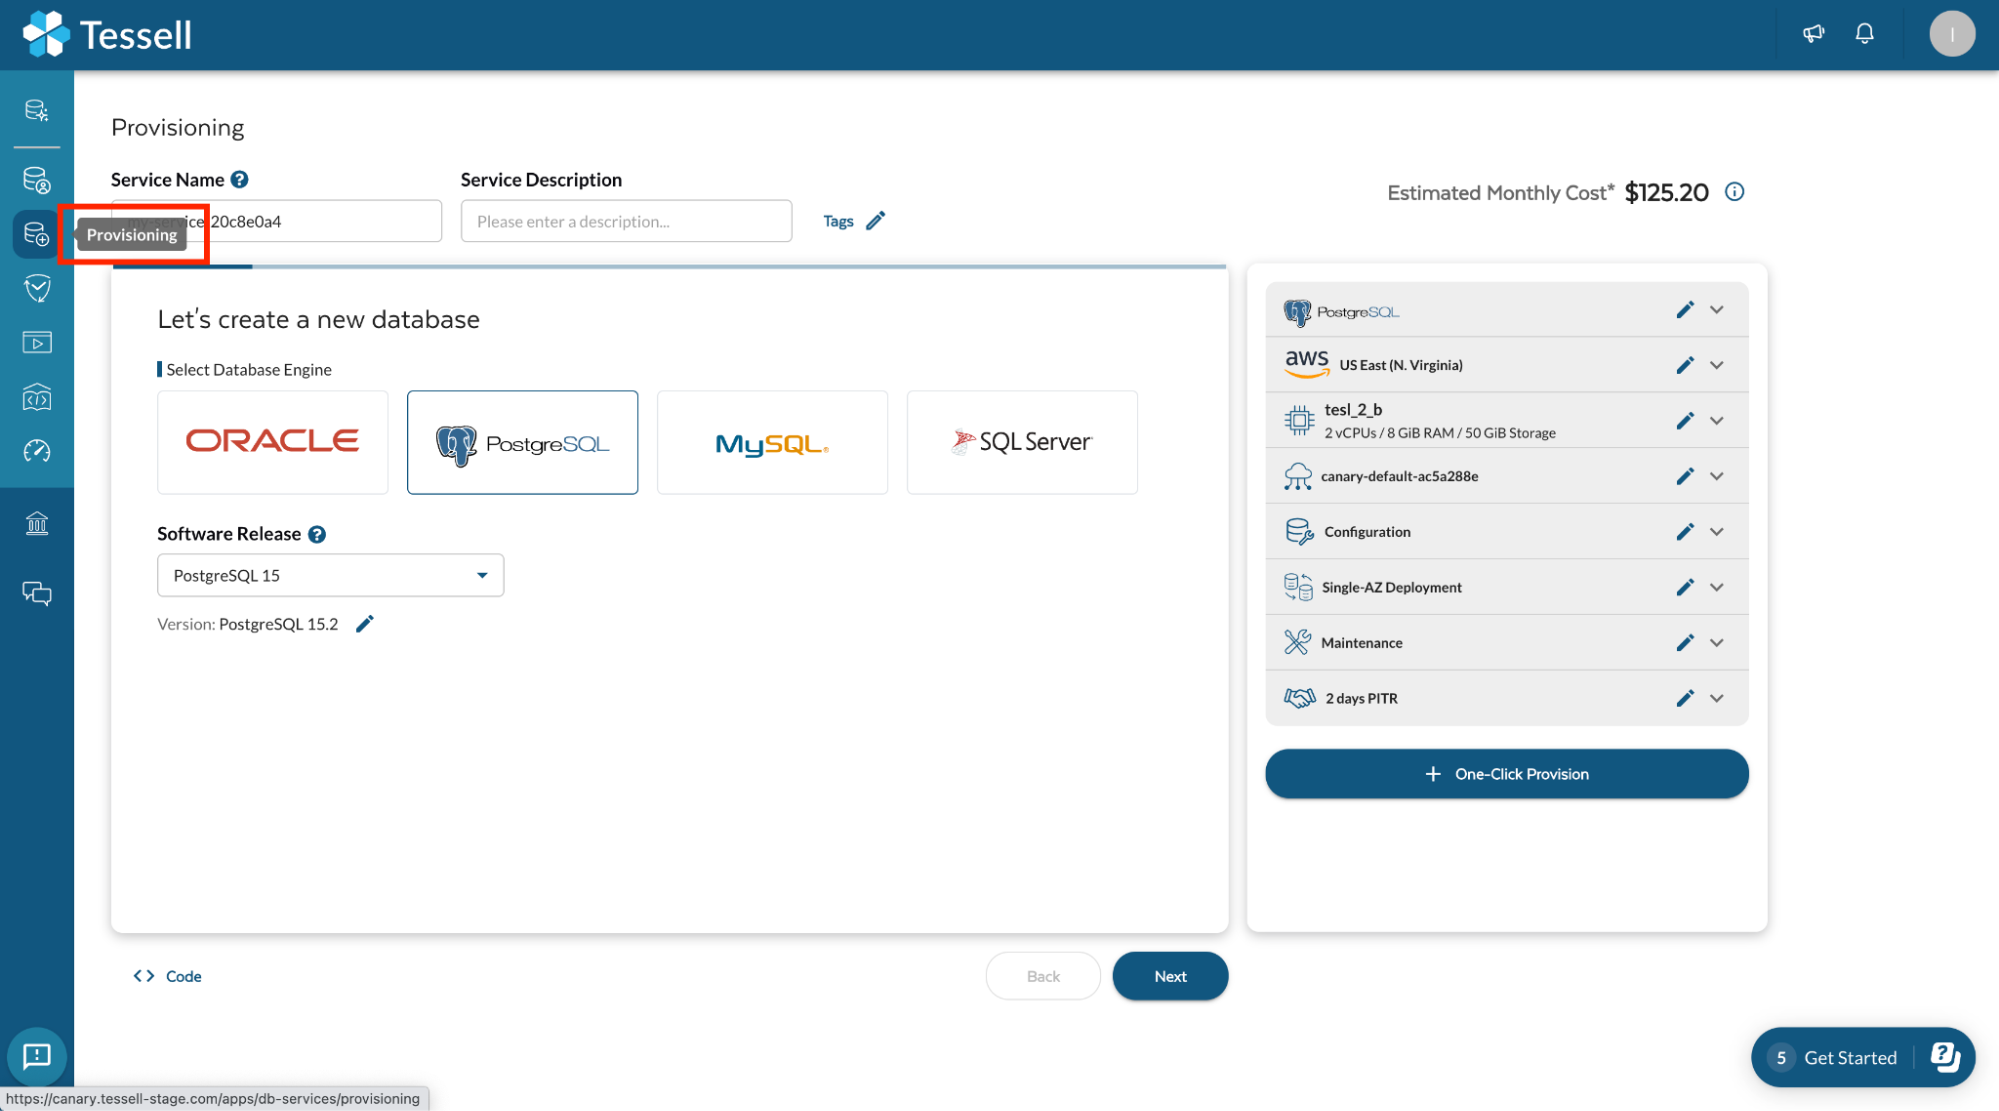
From the Tessell dashboard, click on the Provisioning option displayed on the left pane.
-
In the Choose a Database Creation section, Provide a Service Name (e.g. my_first_database) and Service Description (e.g. This is my first PostgreSQL database).
-
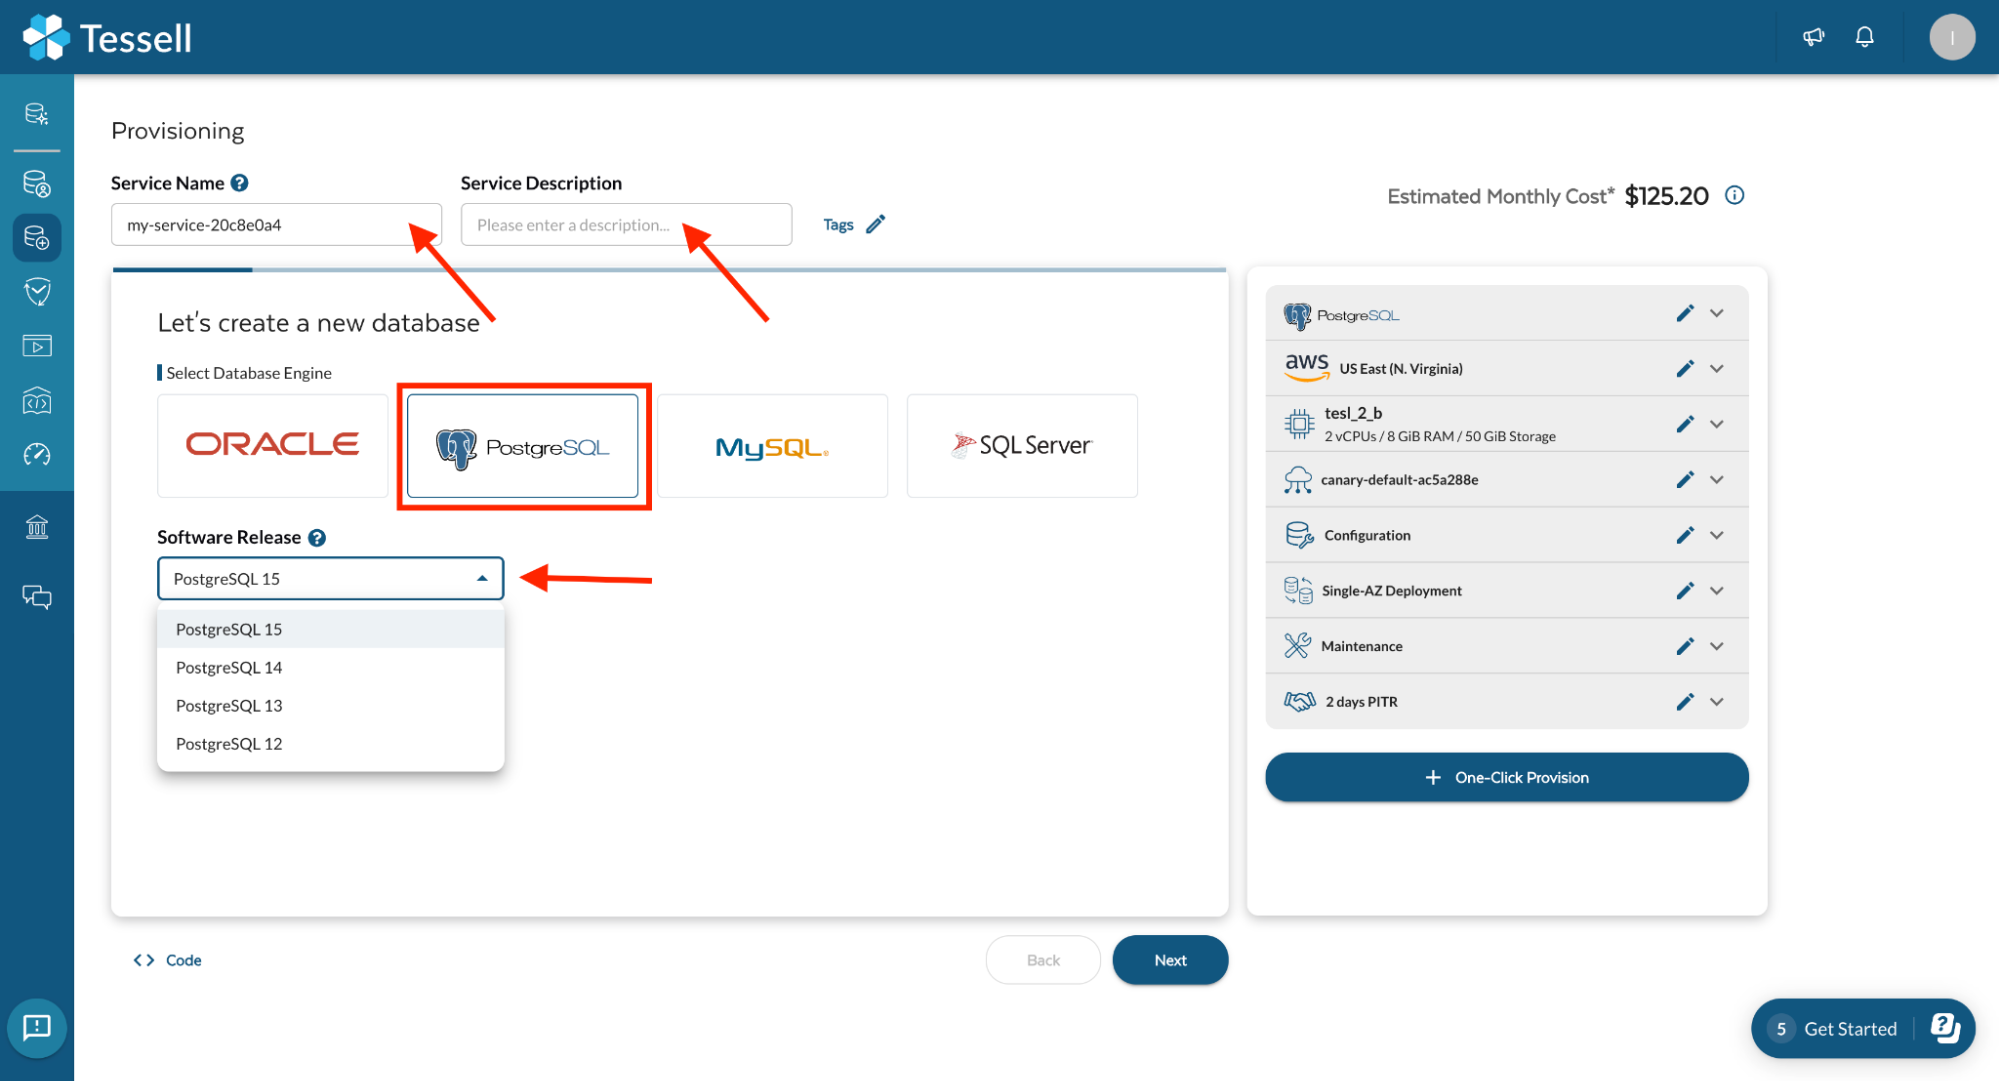
Next, in the Engine Options section, choose the PostgreSQL engine type and the PostgreSQL 15.2 version.
-
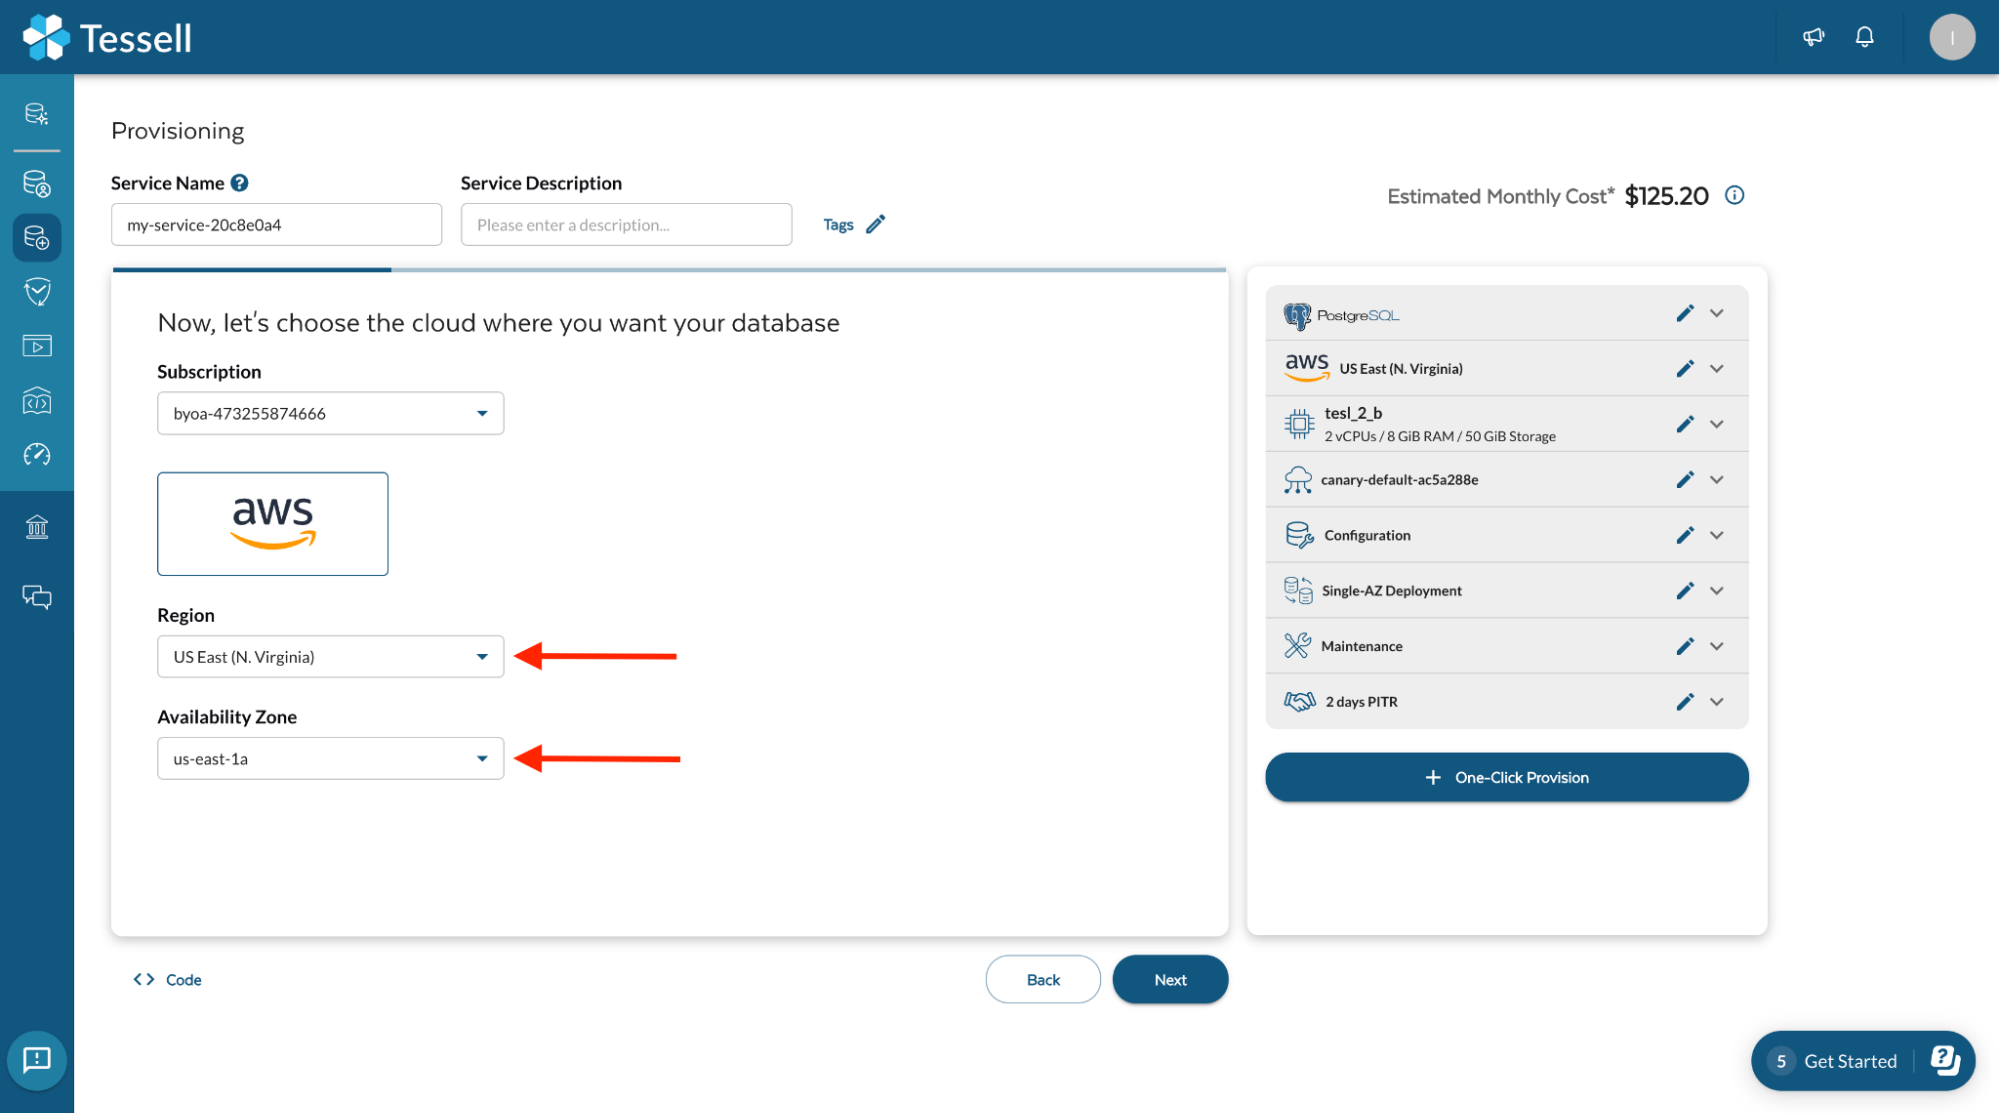
Click Next, In the Choice of Cloud section, Select the AWS region and the Availability zone from the drop-down menu where you want to deploy the PostgreSQL database.
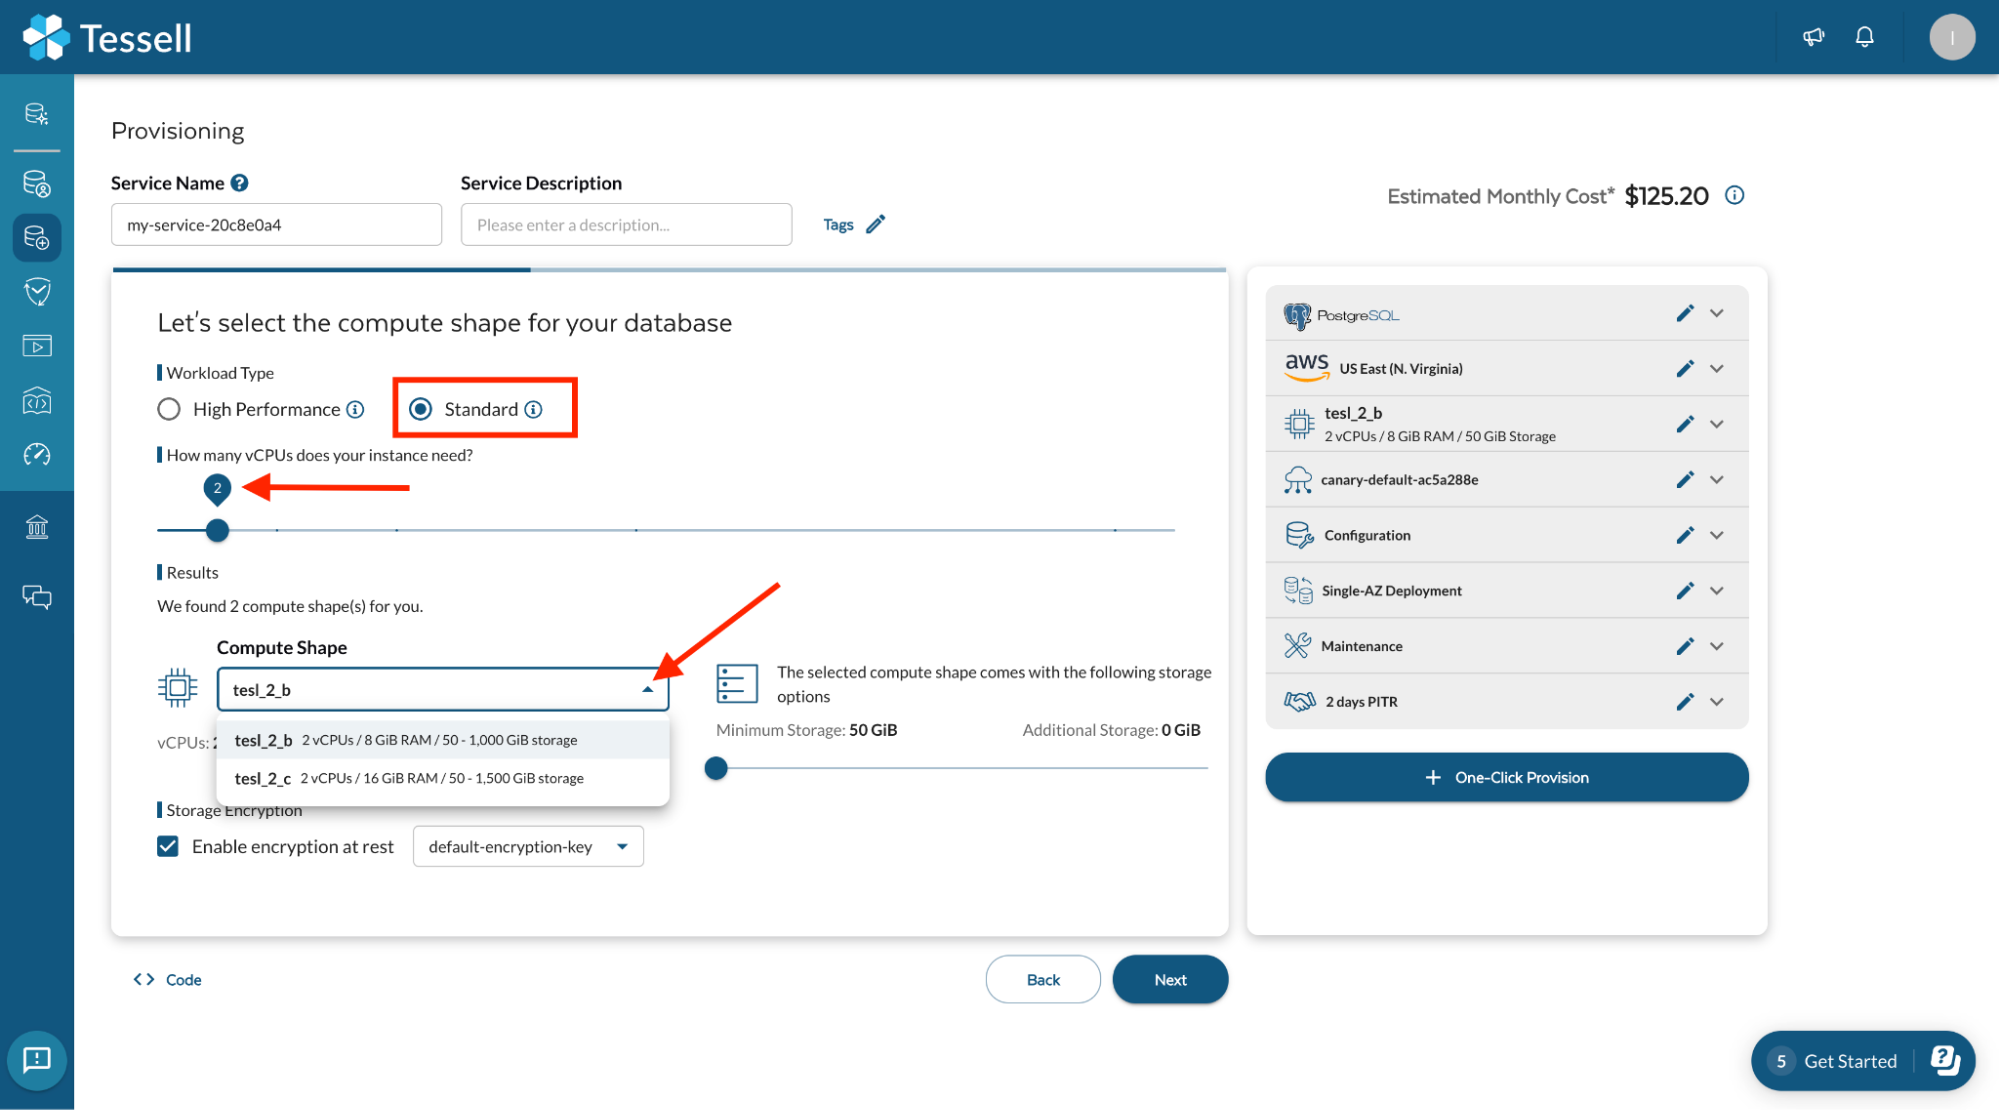
In the Compute section, there are two types of Workload types available. Standard and High Performance. High-performance is Tessell’s NvME-based offering to support your critical applications that require very high IOPS.
-
Click Next, In the Compute section, select standard Performance under Workload Type and set vCPUs to 2. Select a shape available from the compute shape drop-down menu. Check the Enable Storage Encryption box.
-
Click Next, In the Connectivity section, you can decide on your connection management properties. Tessell creates a default VPC while onboarding the subscription.
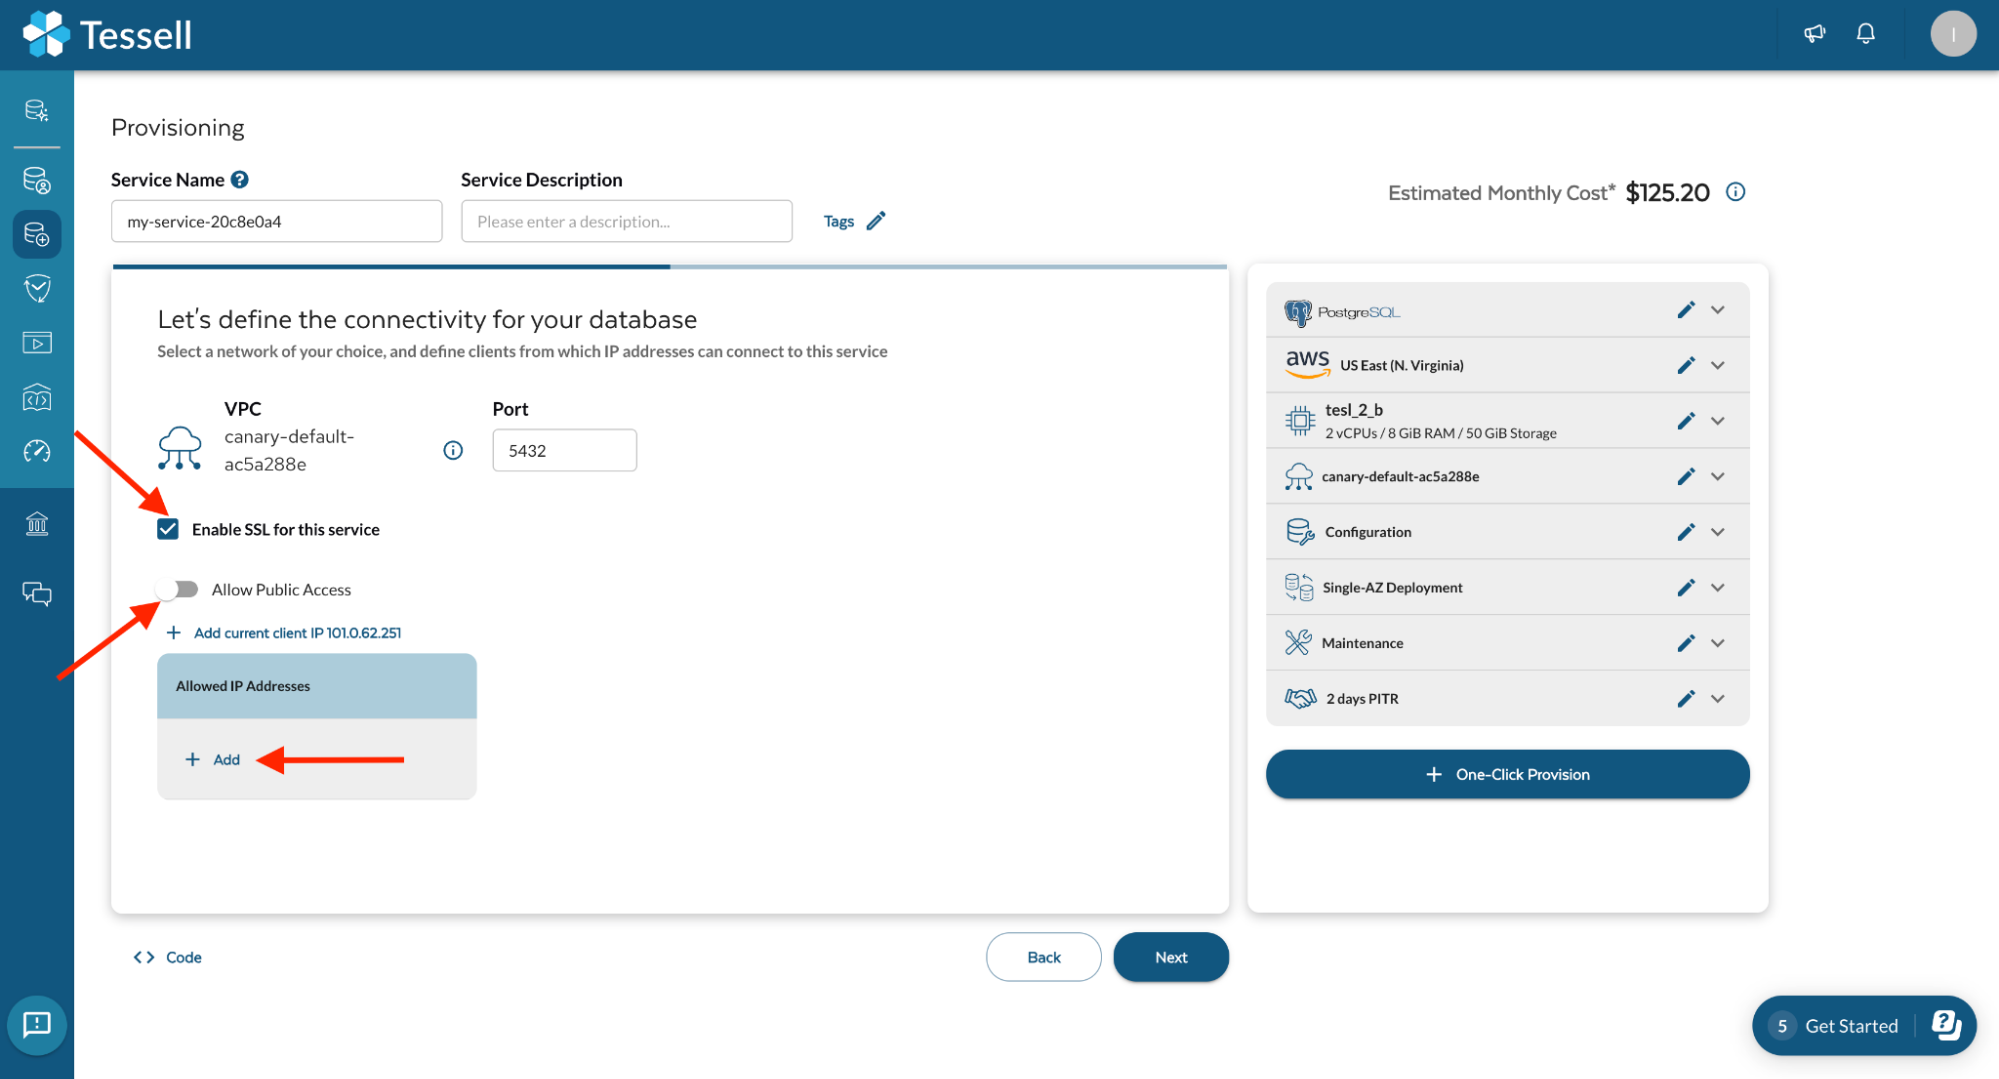
SSL allows secure in-flight encryption. To allow access to these databases from a public or private subnet, please whitelist the required IPs here.
Note: By default, Tessell provisioned databases are completely boxed and can’t be connected until networks or IPs are whitelisted.
-
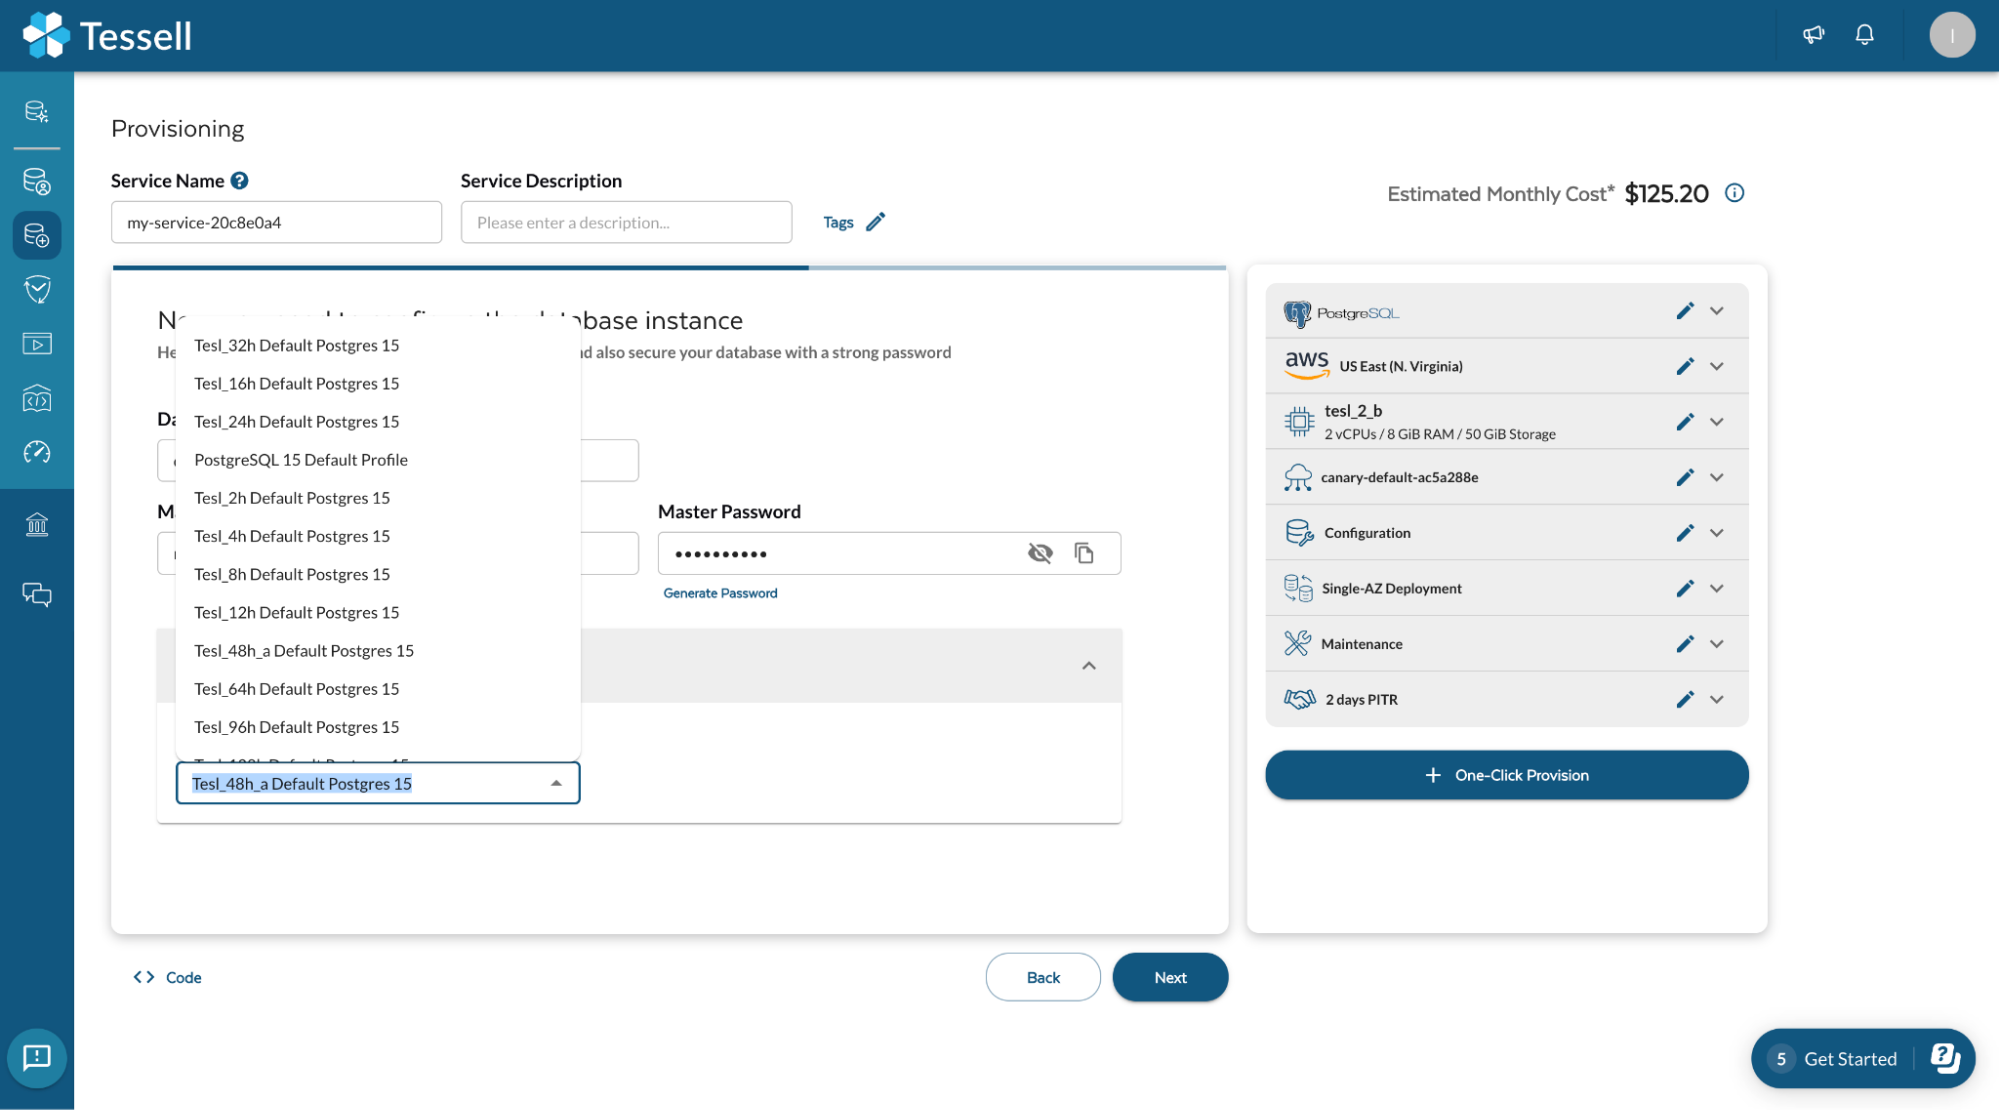
Click Next, In the Configuration section, select a strong password to secure your database or generate a password by clicking on the Generate Password option. Under Advanced Configuration, choose your database parameters under the Parameter Profile section.

-
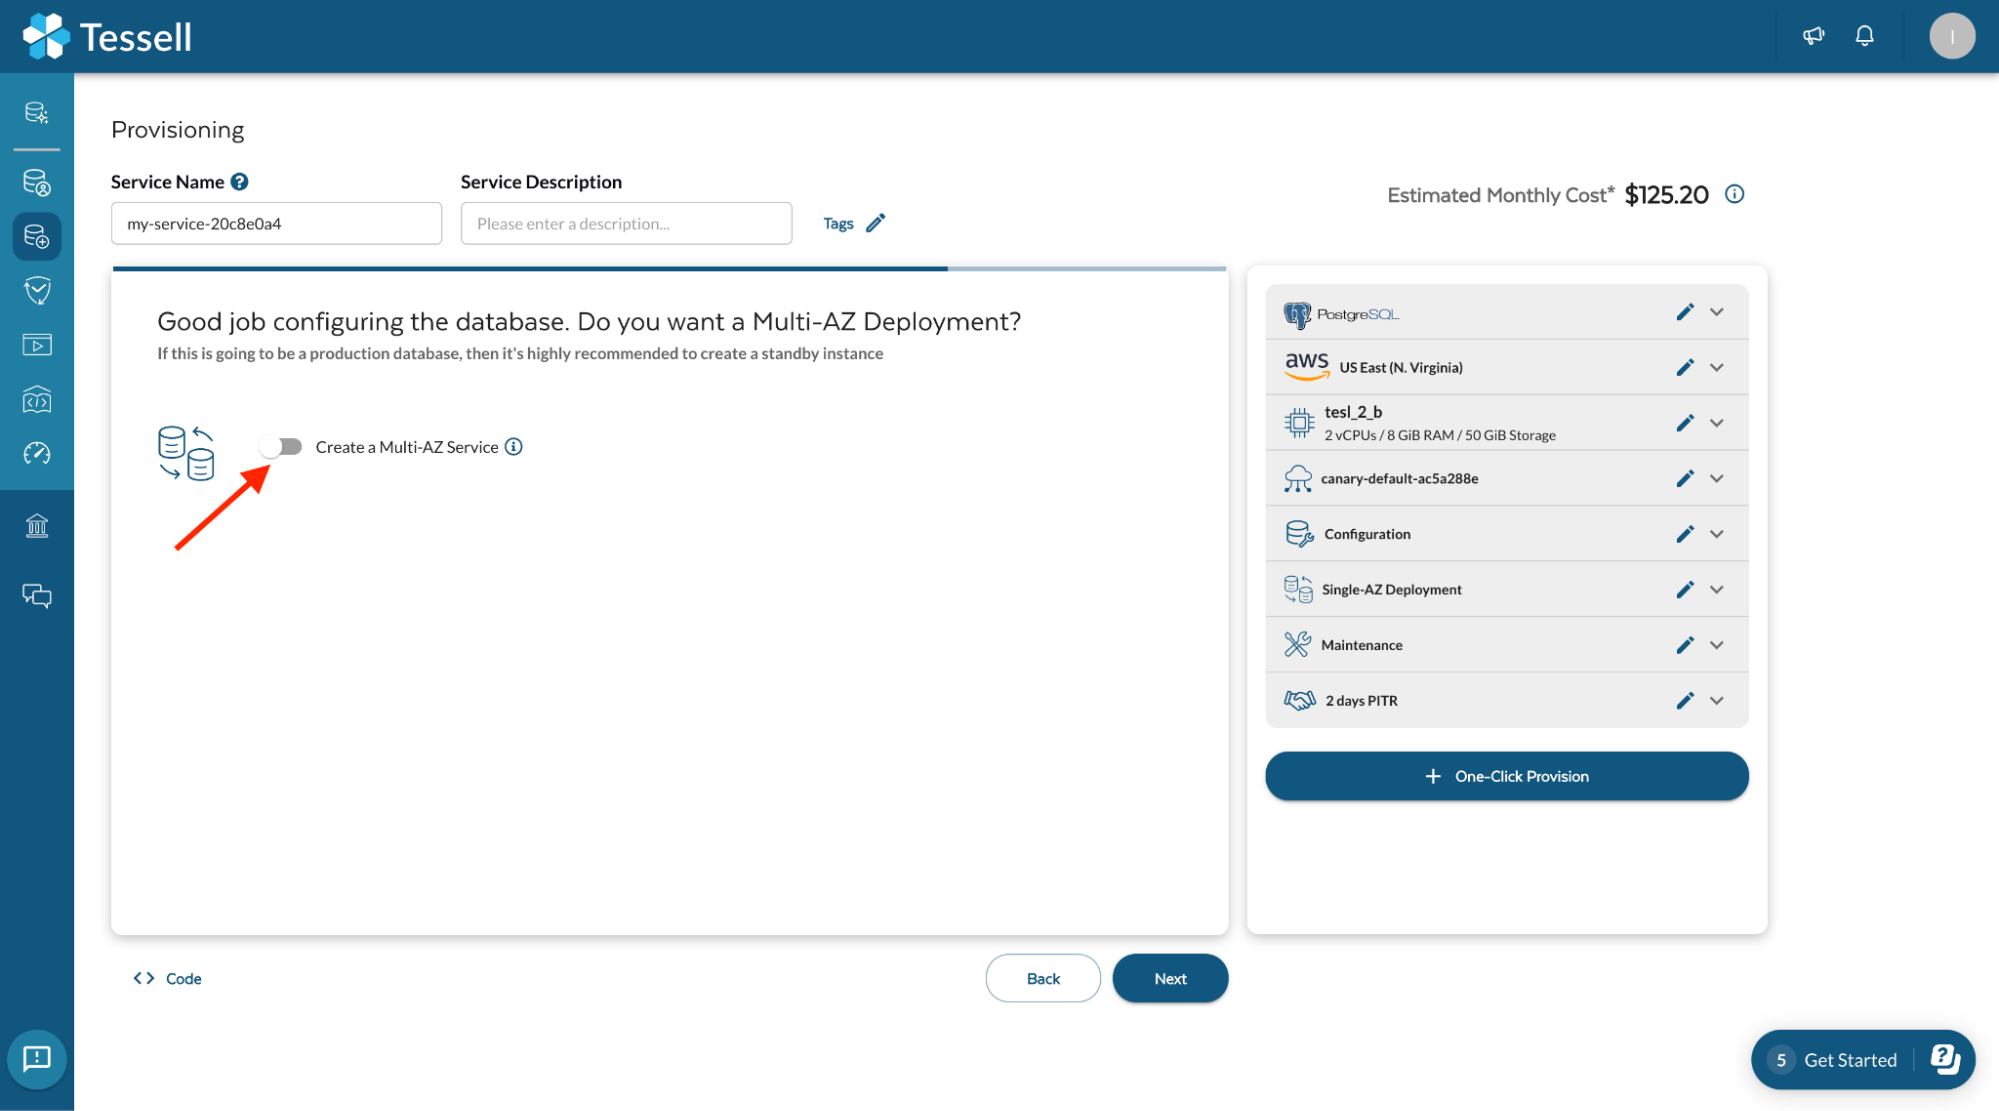
Click Next, In the Availability and Durability section, if you wish to create a multi-AZ High availability cluster, select the Create Multi A-Z Service option. If you want to create a Single instance database, leave it at default.
-
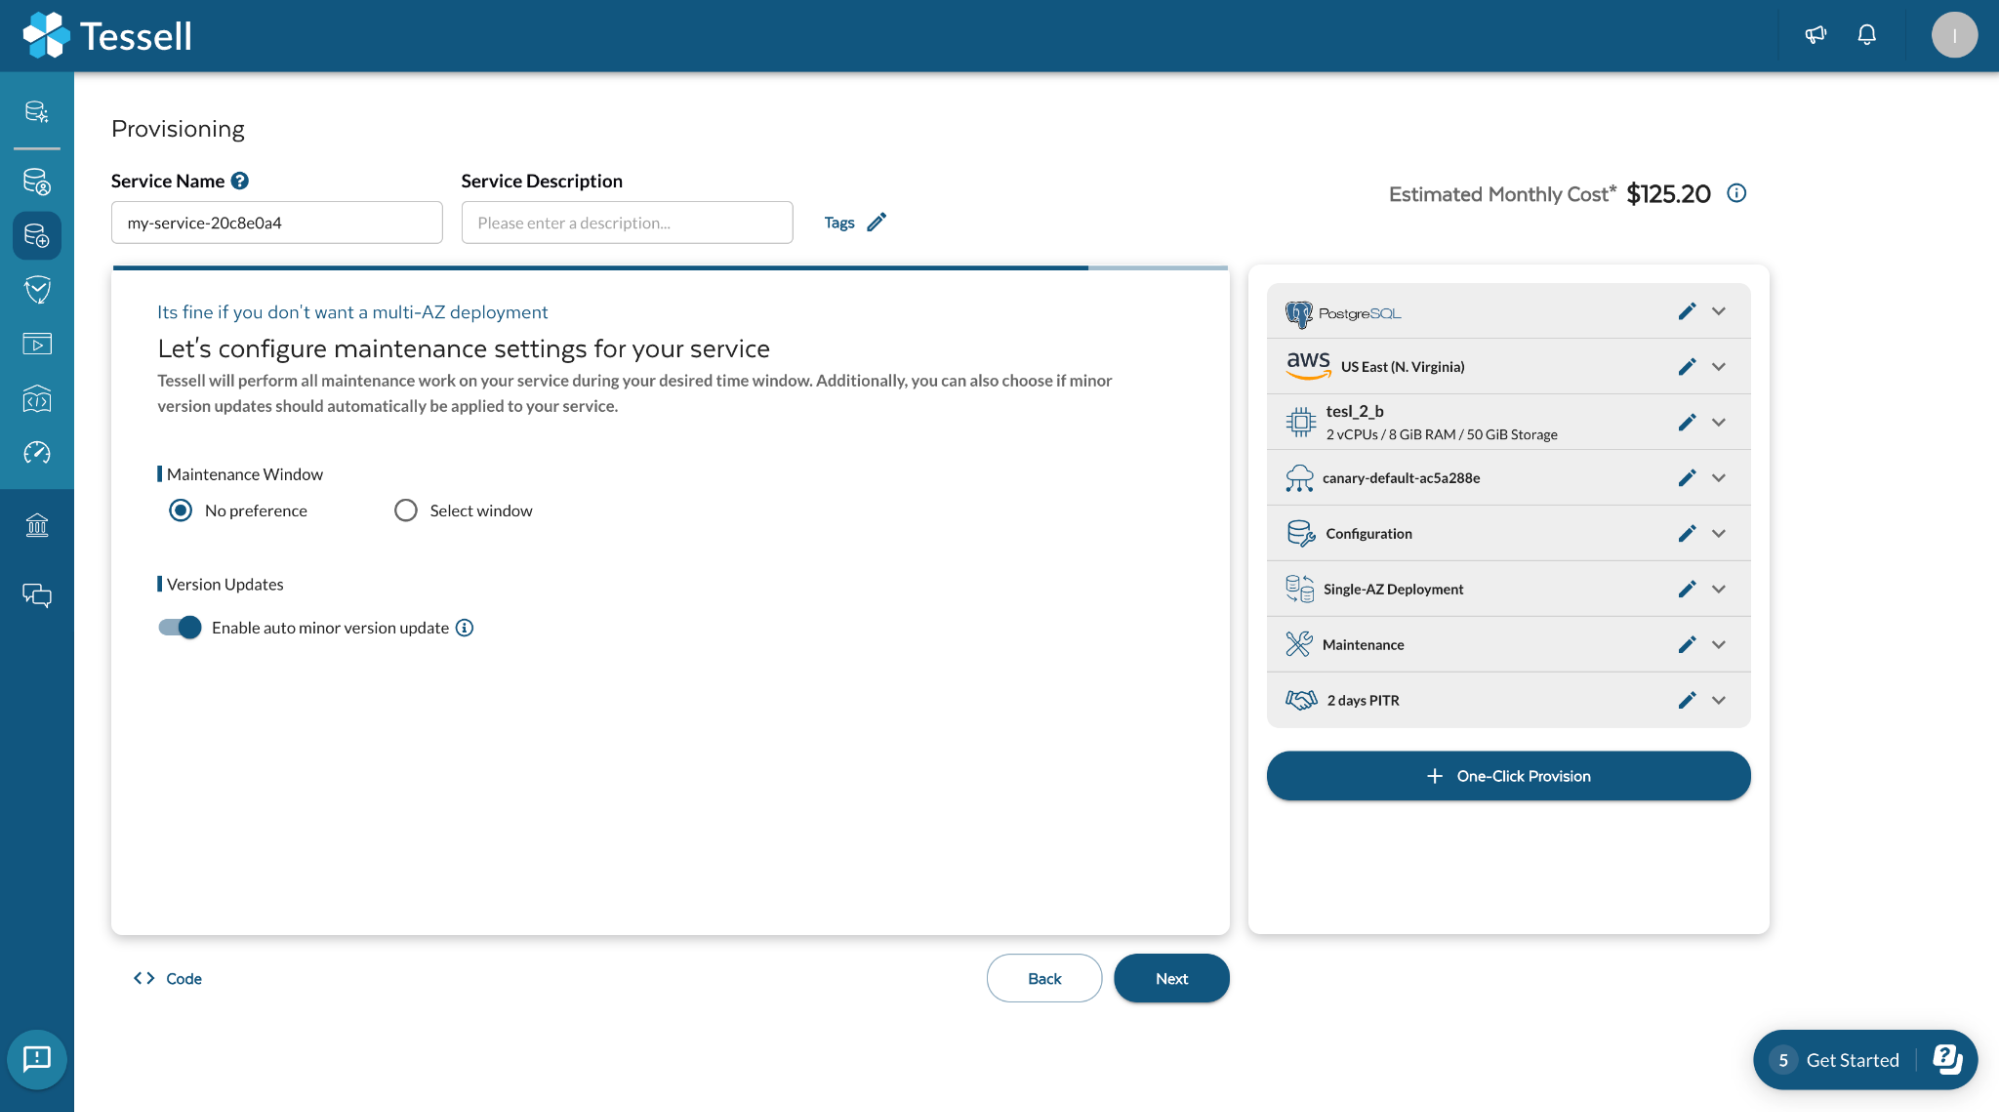
Click Next, In the Maintenance window, upgrades and patches are applied to the maintenance window selected here.Leave it at default.
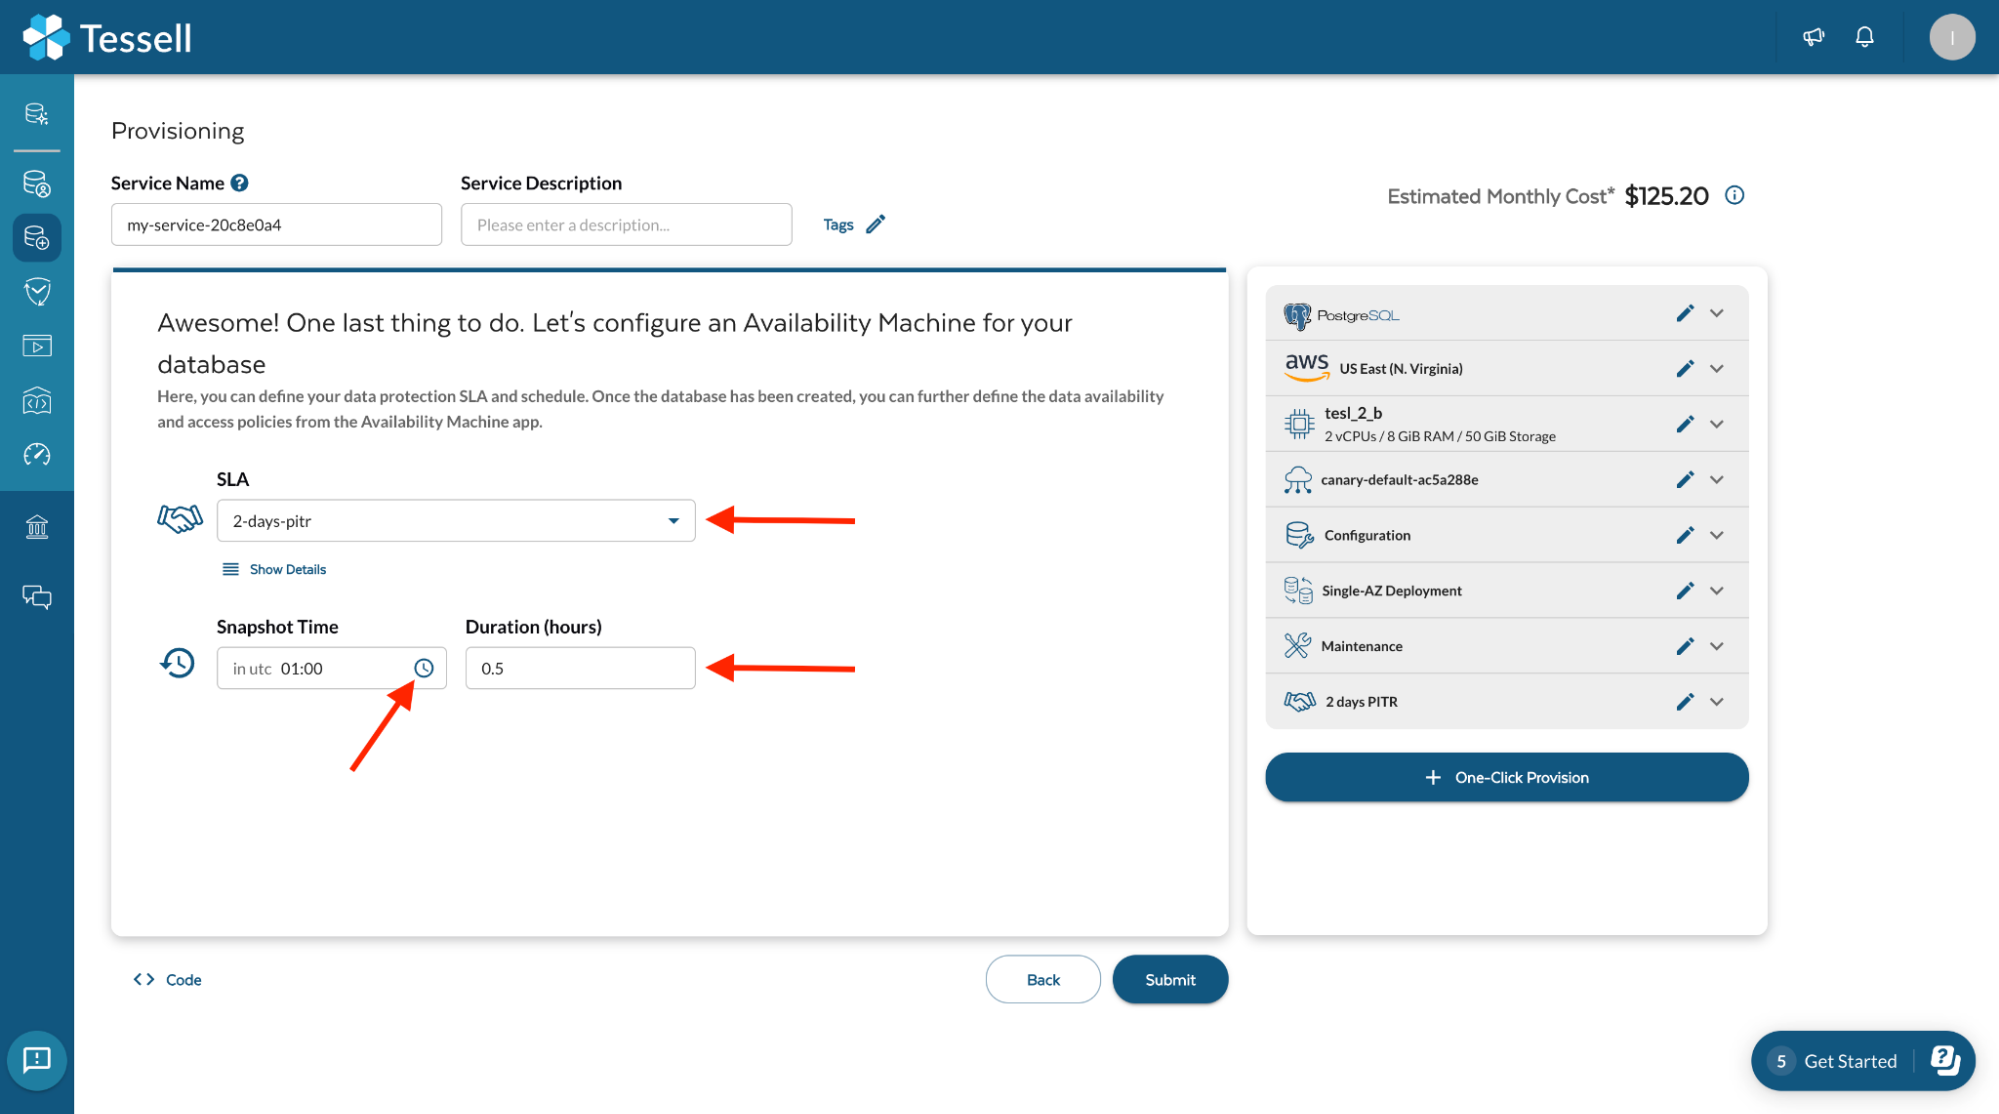
The last step towards creating your database, Configure an Availability Machine. Select PITR under the SLA option, Setup the Snapshot Time from the clock and click on duration (hours) to set the snapshot duration.
-
Click Next, Set your SLAs and automated snapshot schedule.
-
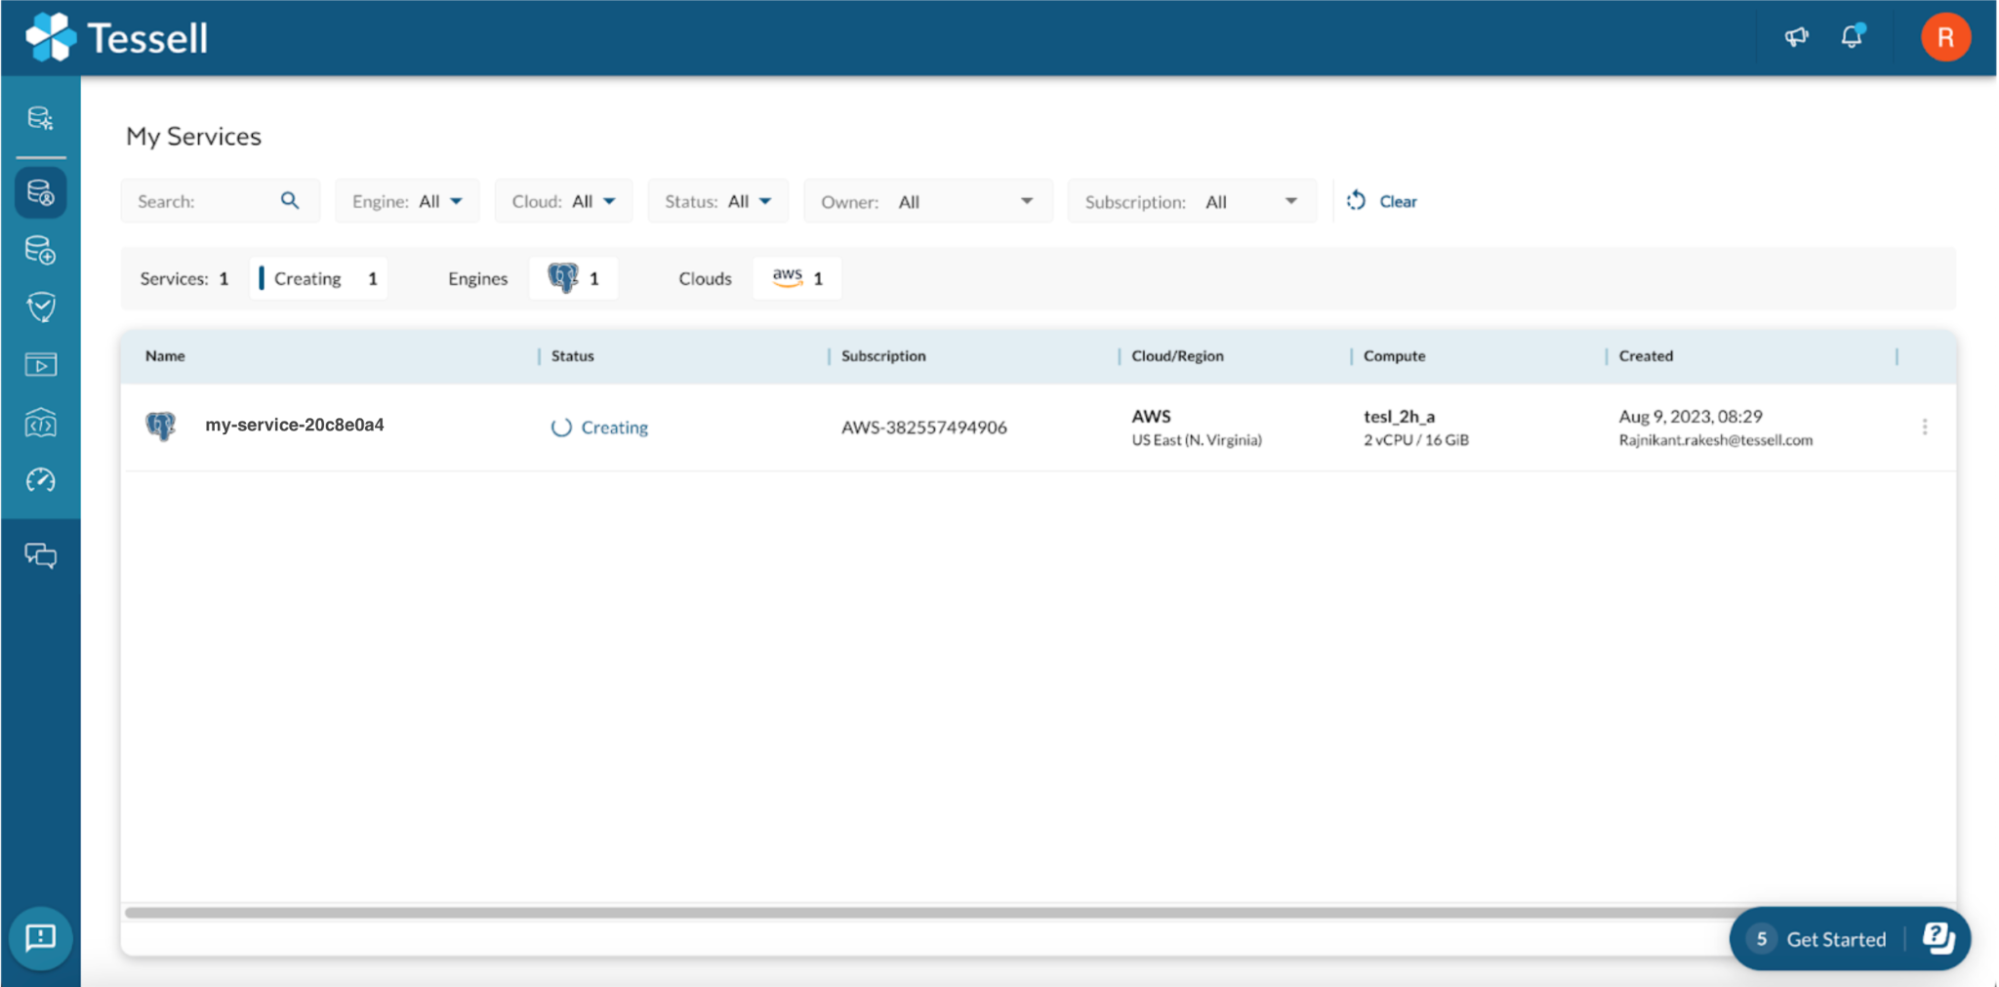
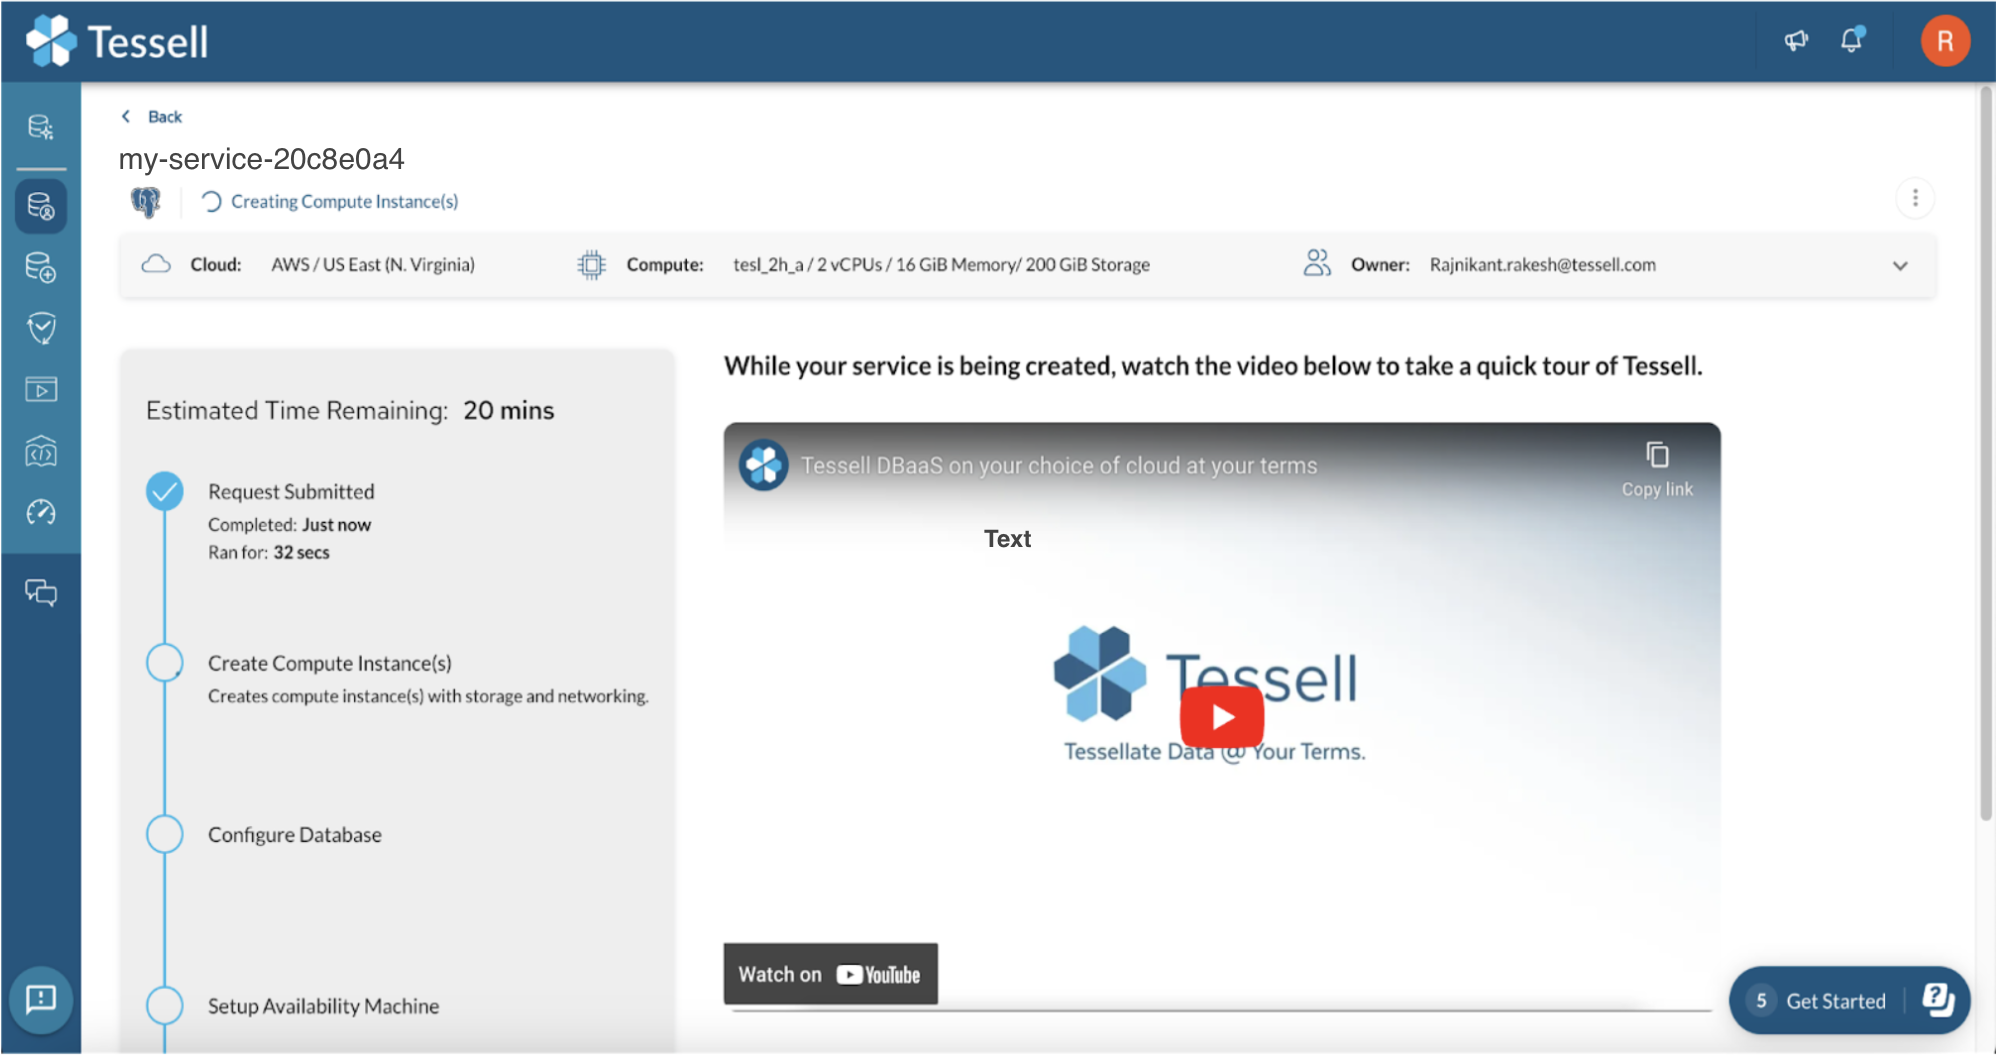
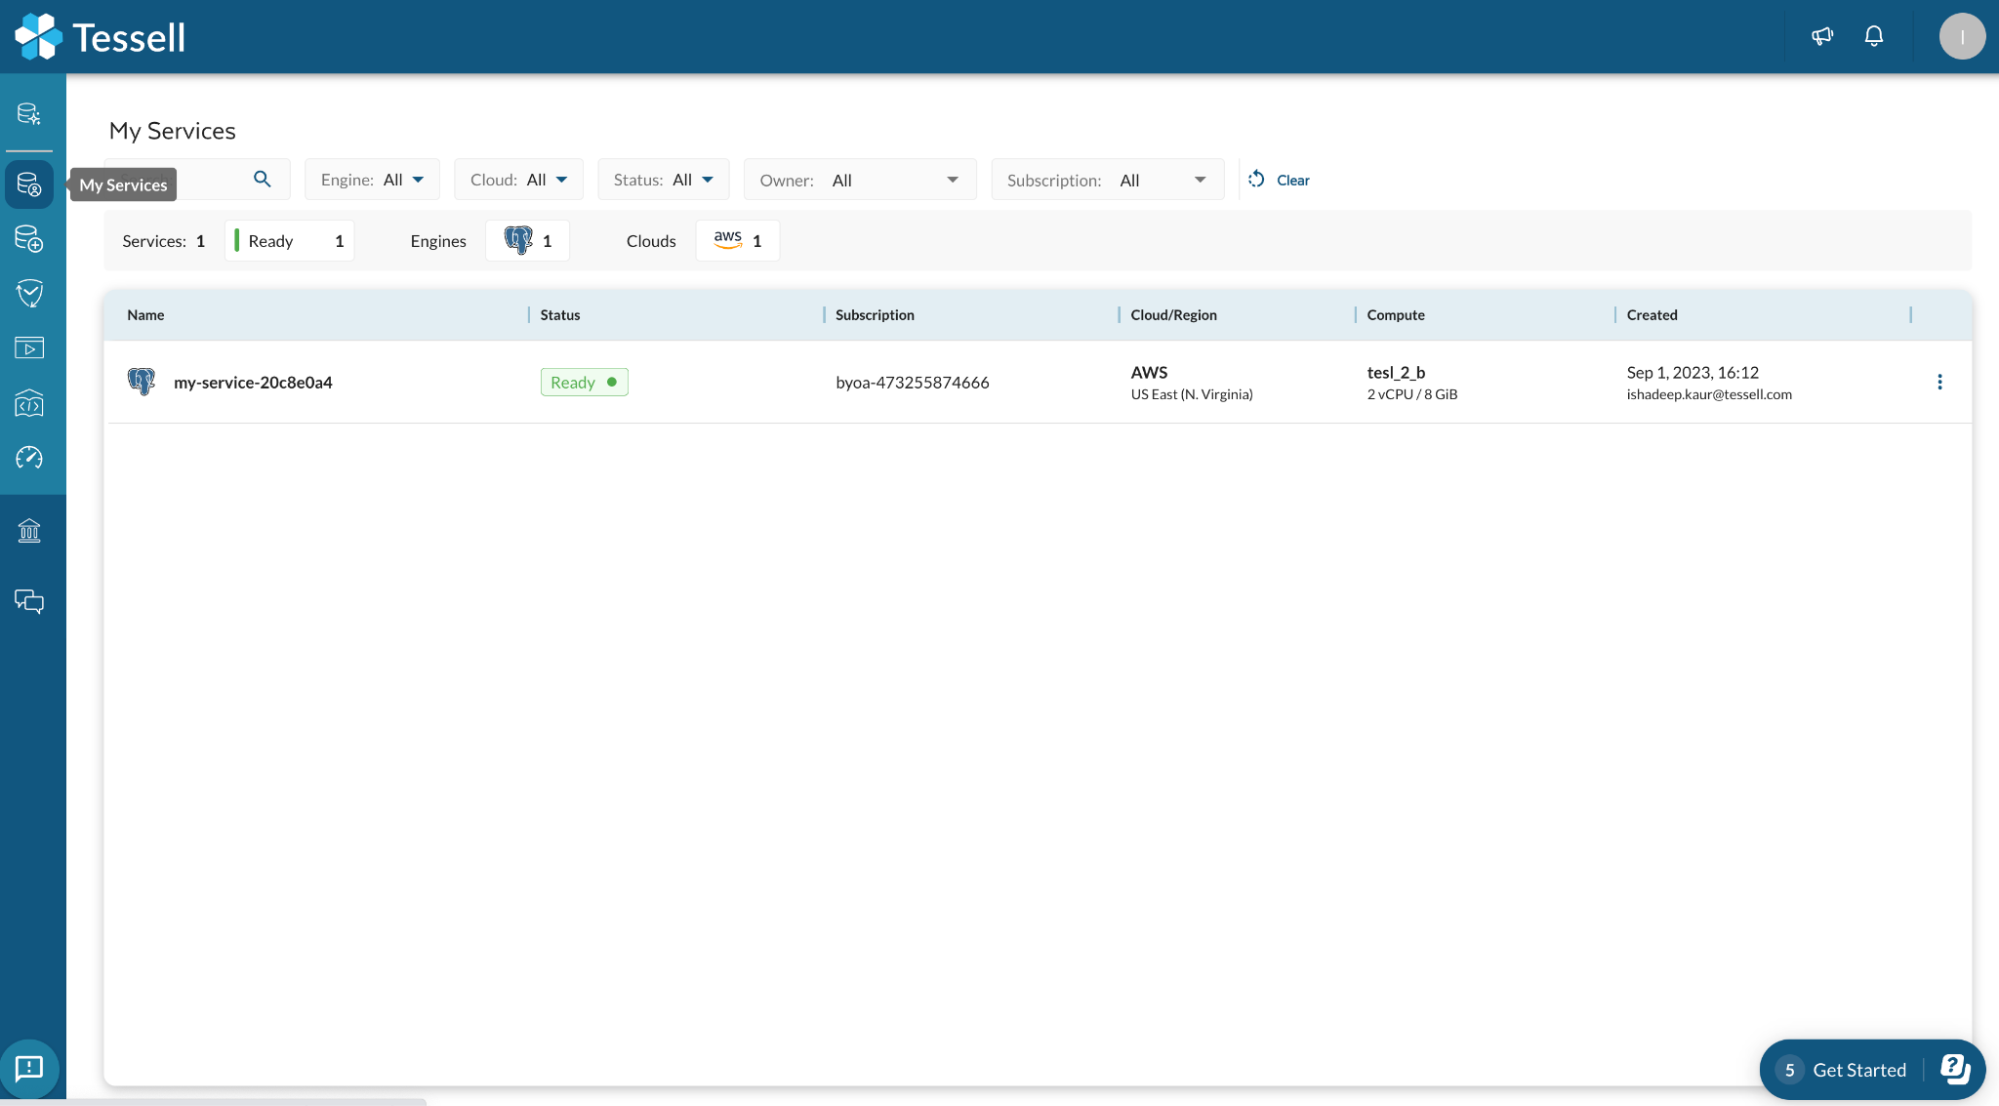
Click on Submit to start your Database creation, database creation is triggered. It will take 15–20 mins to finish.
Next: Database Connectivity
How to connect to Tessell database service from client tools.